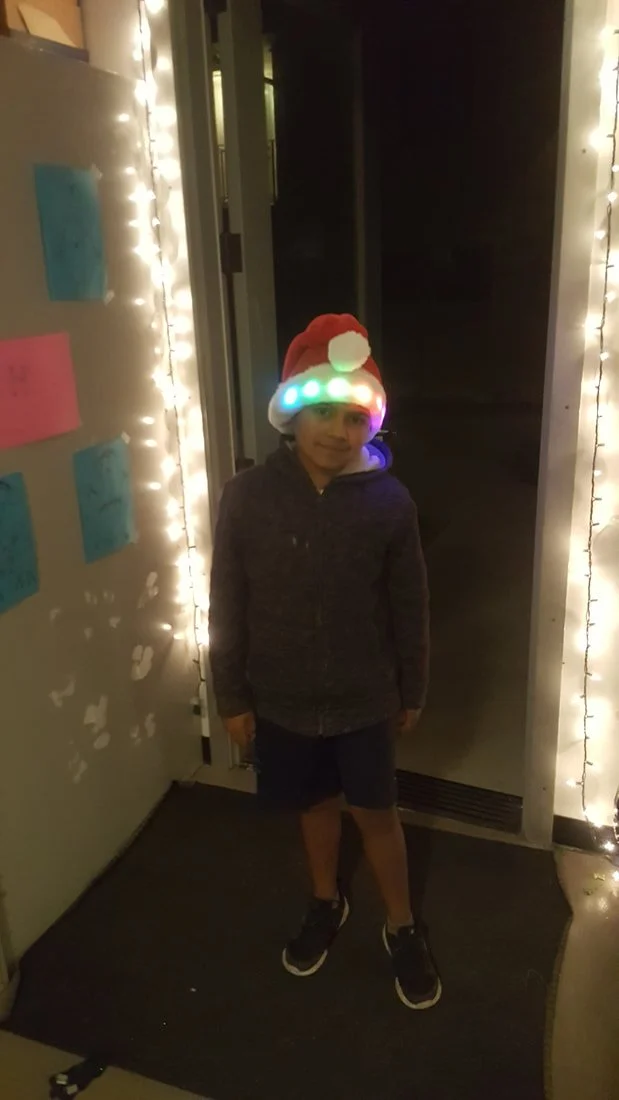
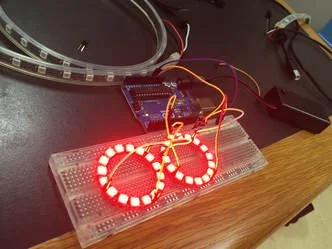
LED Santa Hat
12/19/2019
We came up with a simple idea to make a light up Santa hat using an Arduino board and an LED strip.
We hooked up the LED strip to the board using jumper cables and alligator clips. No soldering! We downloaded the Neopixel library and used a sample script to program the lights. https://github.com/adafruit/Adafruit_NeoPixel
The hat had a fold in it that we could put all the equipment in, but it wouldn't stay in place and the wires were showing. That's why we had to use a needle and thread and stitch the fold shut. It holds everything nicely!
Now we are showing our Christmas spirit with lights! Happy holidays and a happy new year!
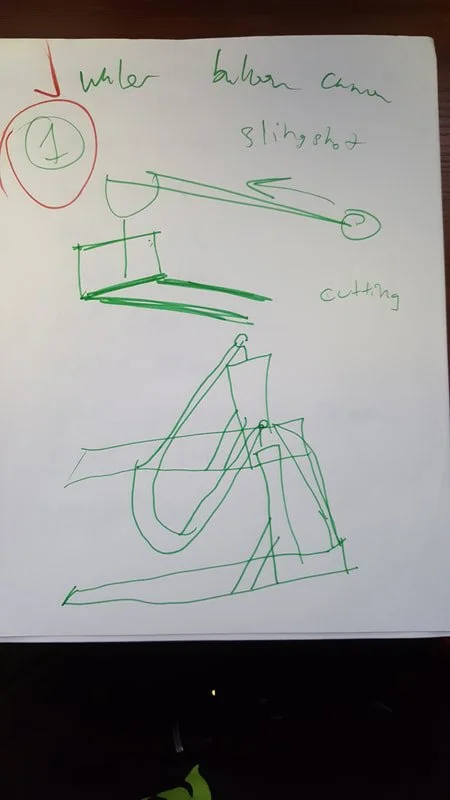
The Water Balloon Cannon
10/2/2019
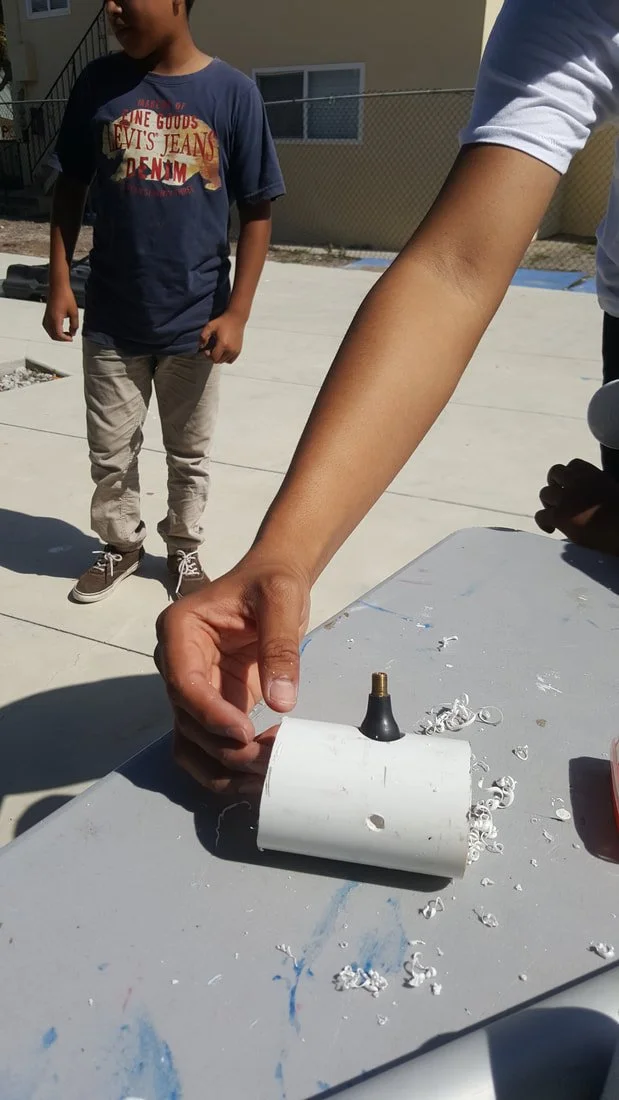
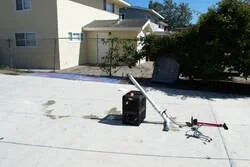
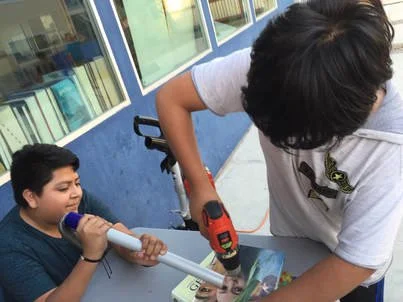
We decided to beat the summer heat in Goleta with a water balloon cannon.
Designing
In July, we started off thinking about the design to use and drew some sketches. We looked online for inspiration and found a design for an air-powered PVC cannon on Make.com.
https://www.youtube.com/watch?v=XXkYxFYX4a8
Revising
After testing it we wanted to fix the leak. We cut off the broken cap and replaced it. We also added some color to it with spray paint.
NYC Trip!
3/10/2019

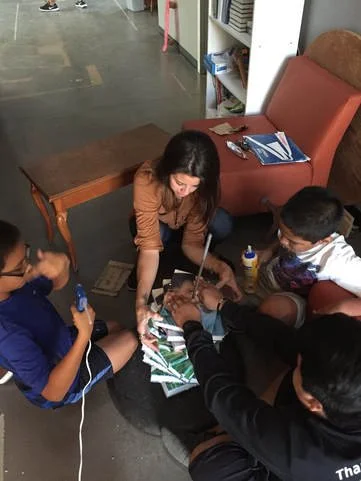
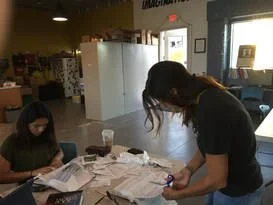
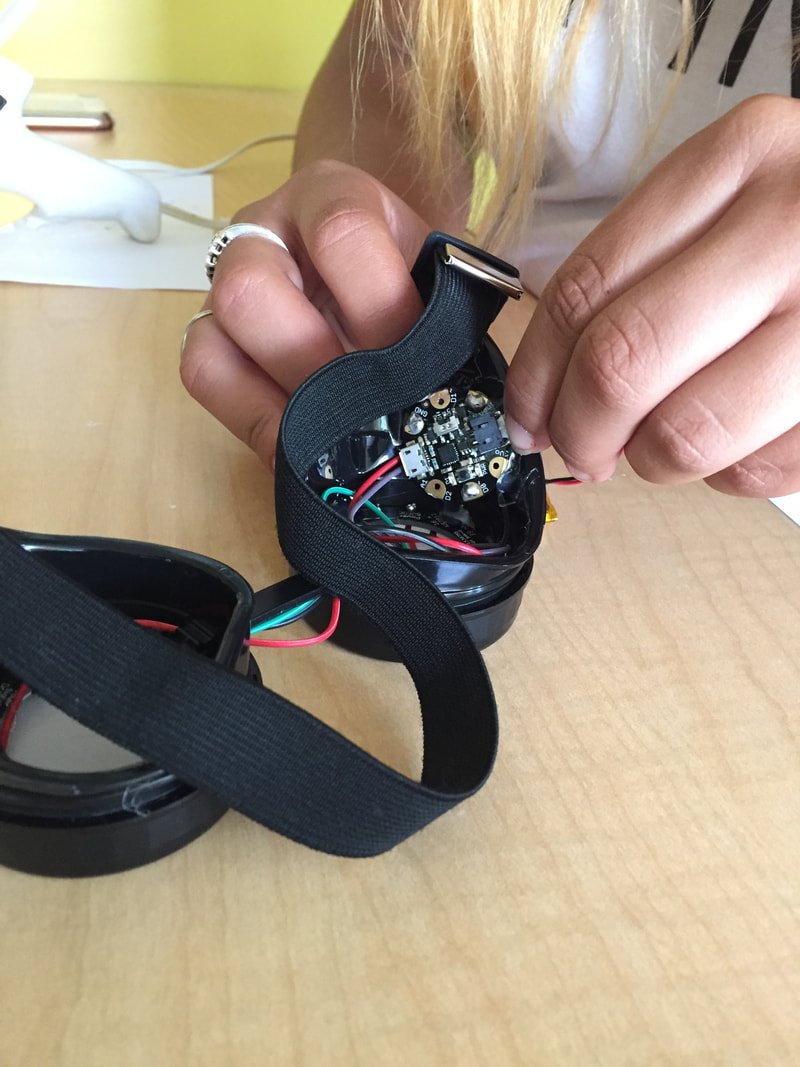
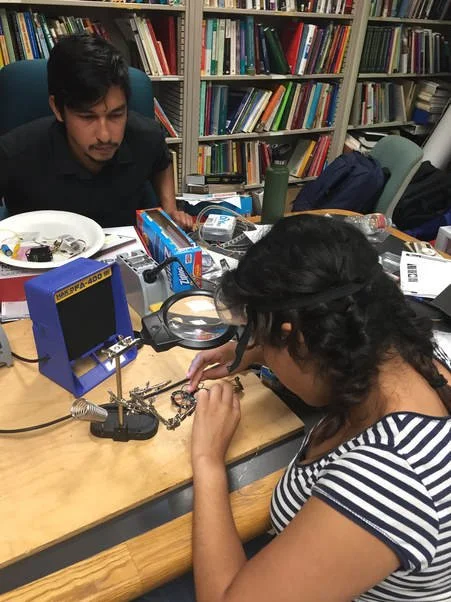
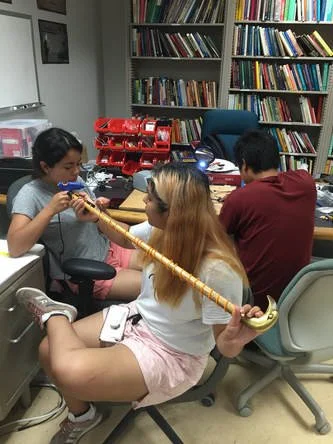
We have been busy working on light-up props for the Nuestra Voz theater camp plays next week. So far we have a light up cane made from EL wire, and light up glasses we learned how to do from this Adafruit tutorial: https://learn.adafruit.com/kaleidoscope-eyes-neopixel-led-goggles-trinket-gemma/overview
We learned how to plan out the circuit and prepare for soldering with the breadboard and wires and then how to solder on the board and wires together. Check out the video below for more lessons learned!

Testing
We waited for the glue to dry and then it was time to test it!
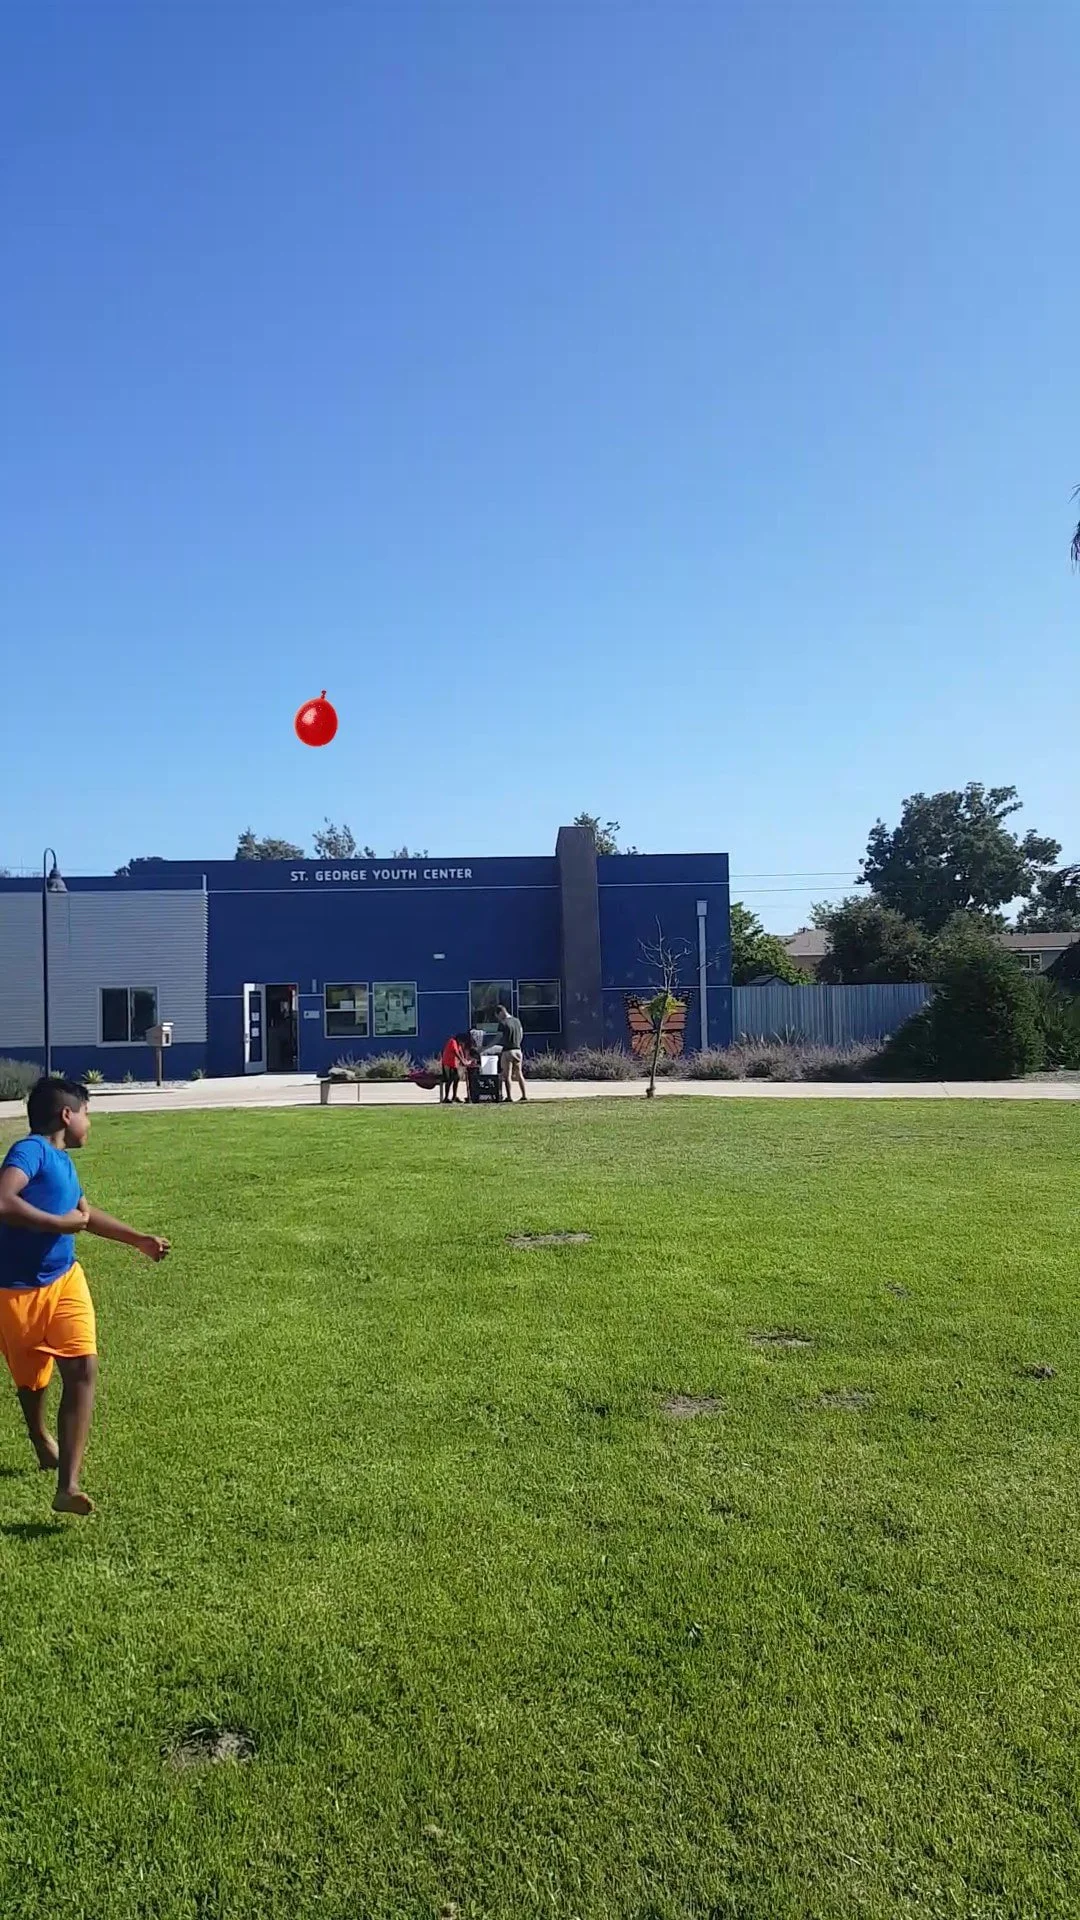
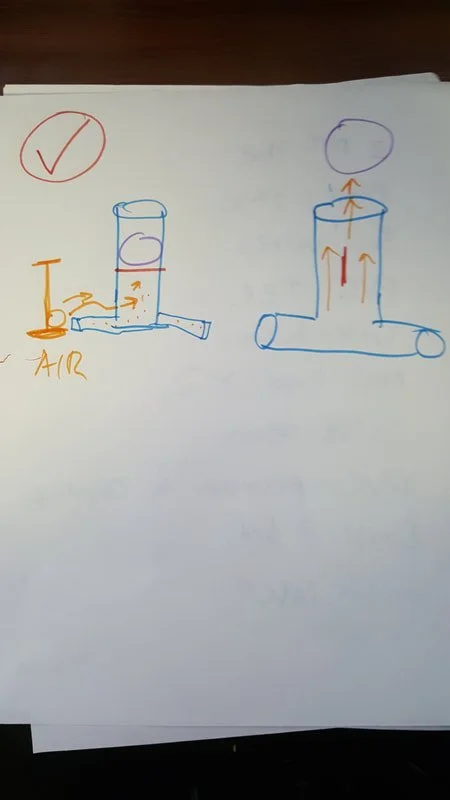
We used a bike pump to put air in the chamber. The pressure builds up and we release the air by twisting the valve, which launches the balloon!
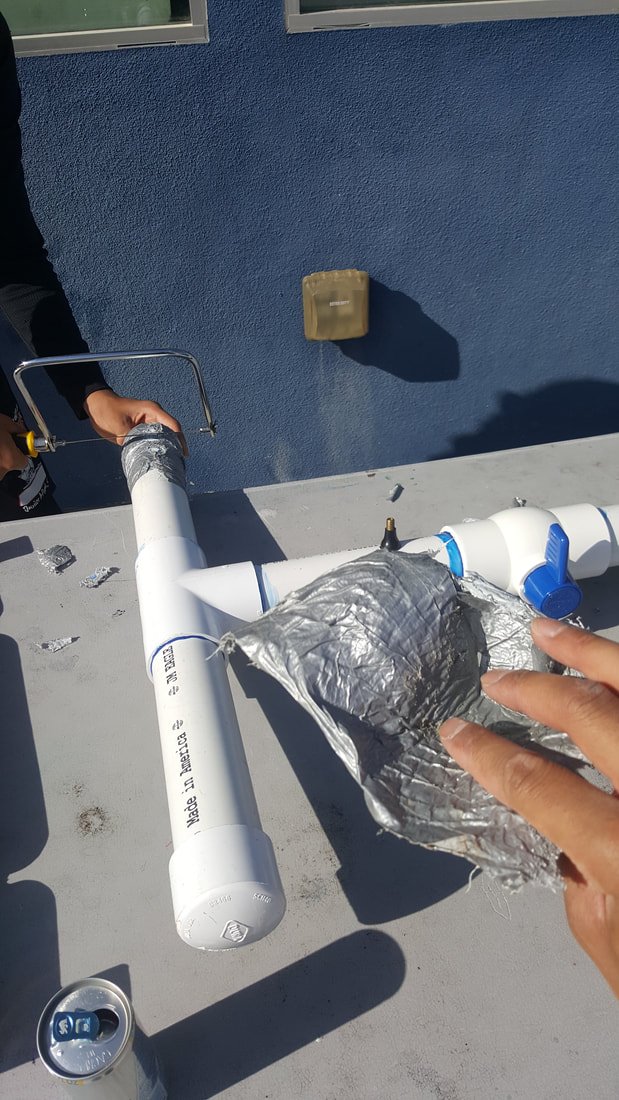
Unfortunately, we dropped it and one of the PVC caps cracked and so there was a big leak. We tried to patch it with duct tape and make the seal tighter with out hands to keep the pressure up.
Even with the crack, it shot over the fence and into the road! We were wondering how far went and although we didn't measure it we estimated it to be over 100ft. Each balloon weighed probably around 3-6 oz.
We didn't have any pictures of water balloons on this day so for fun here is a simulated version of the events that occurred:
Building
We had a lot of fun building the cannon. It wasn't difficult for us. We printed out the plans from Make magazine and measured how long we should cut the pipes.
We glued the caps to the pipes and drilled a hole that was the perfect size for the valve.
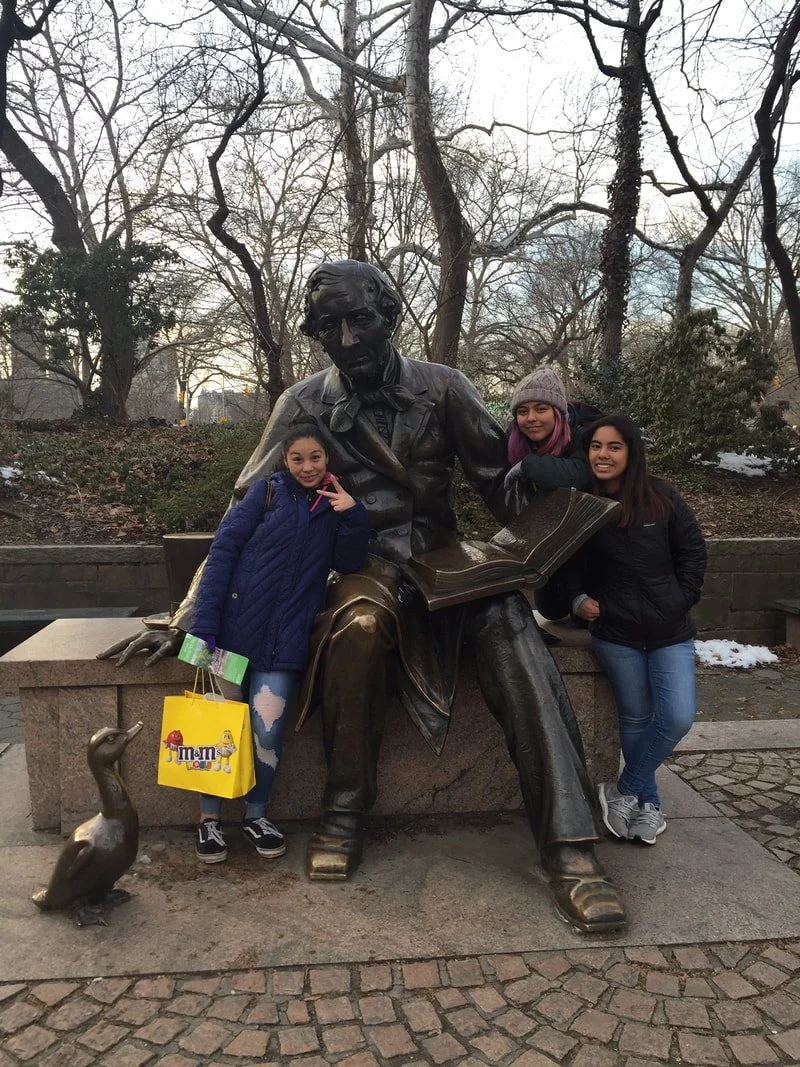
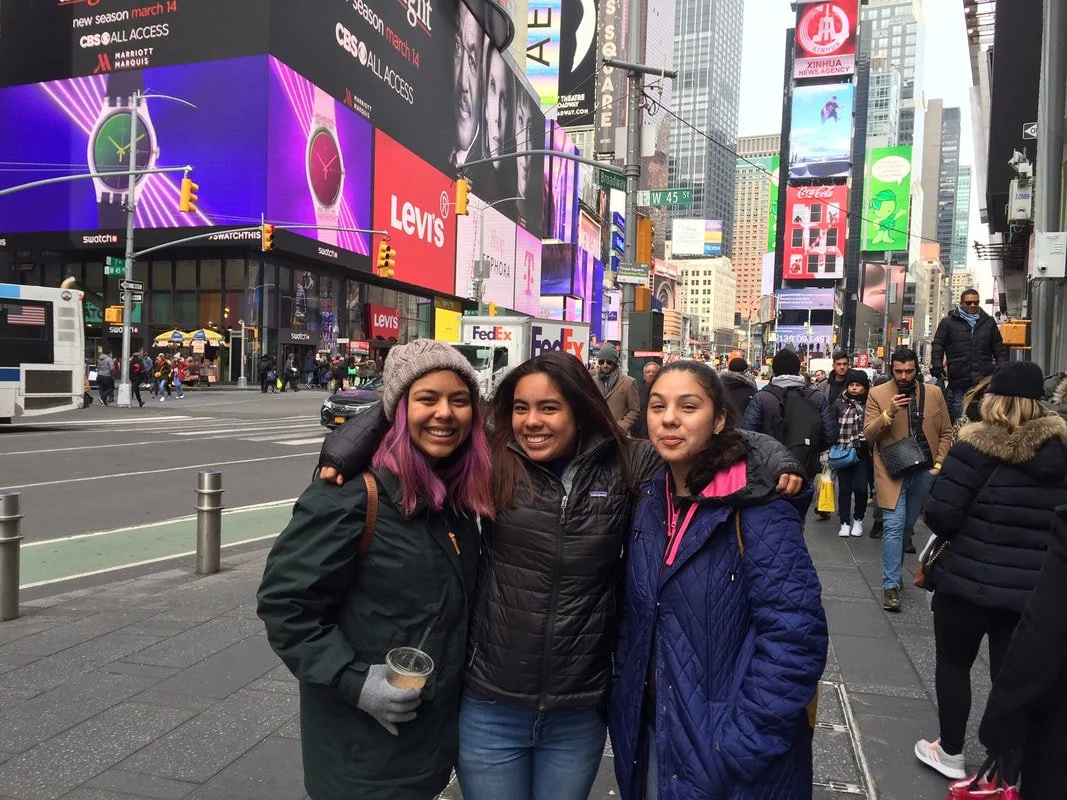
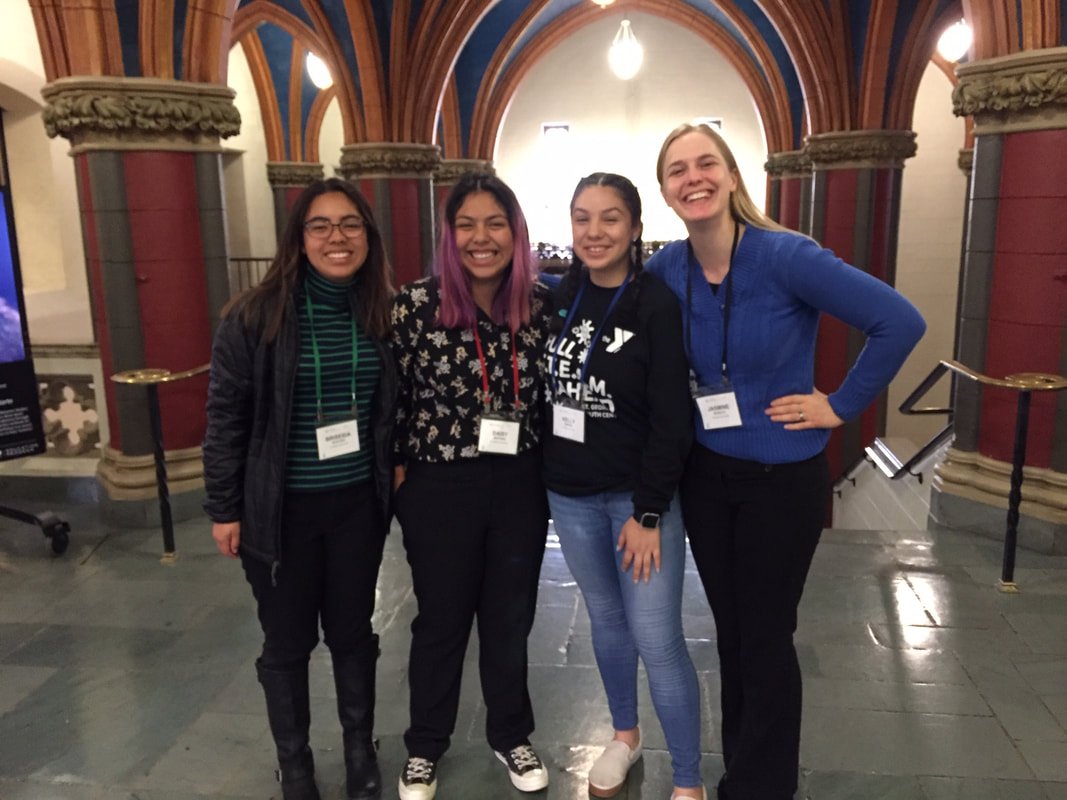
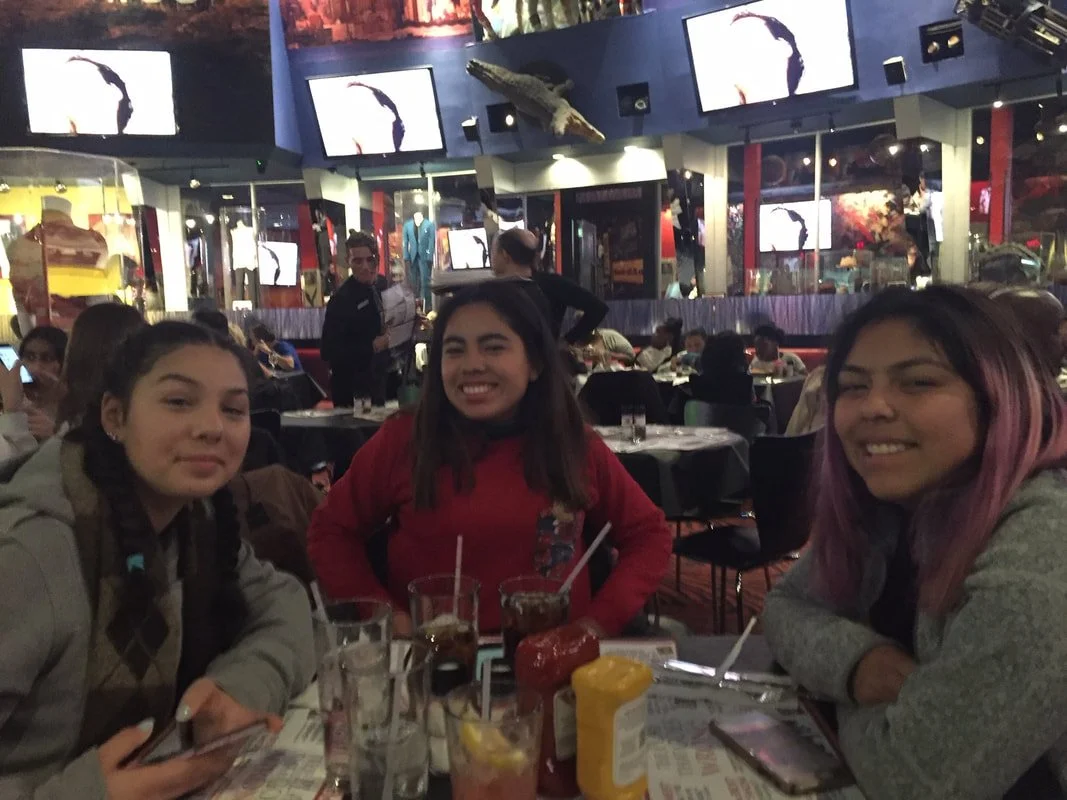
This weekend we went to New York, flying for the first time and attending and presenting a conference for the first time! For Kelly it was her first time leaving the state too.
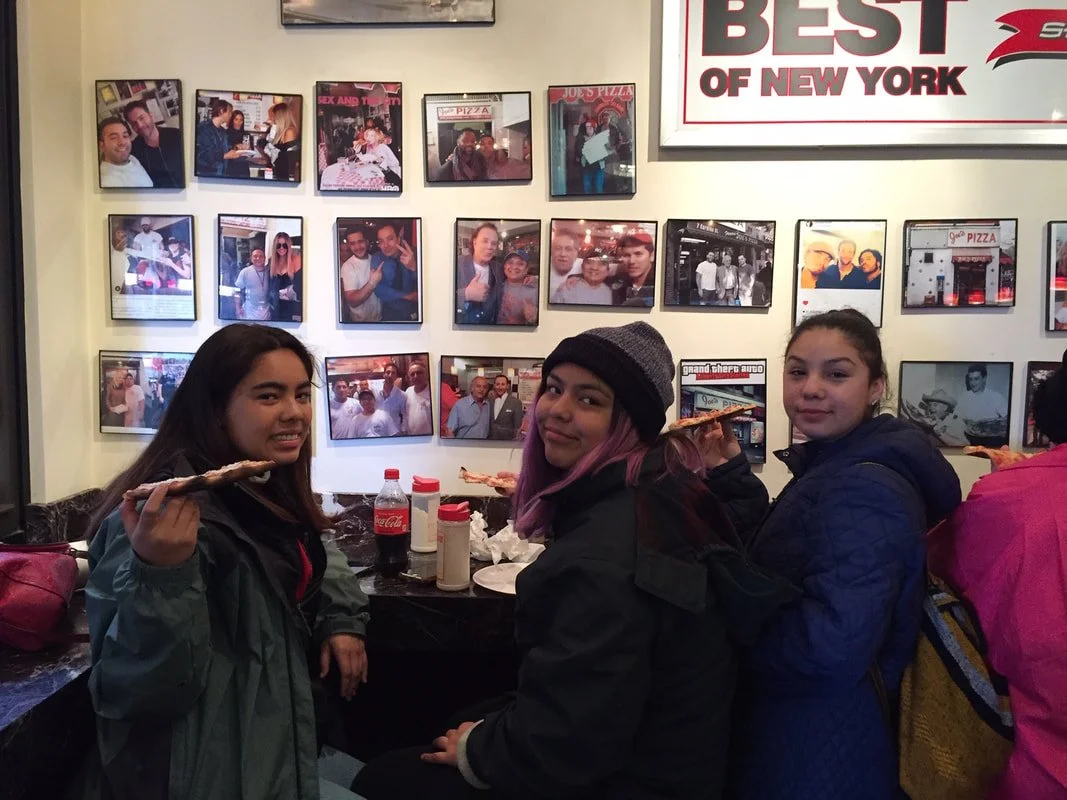
Our favorite thing about New York was walking around and trying all the food: pizza, bagels, burgers, coffee, Carlo's Bake Shop, and the M&M Store. We also stopped at Planet Hollywood and got a birthday sundae for Kelly.
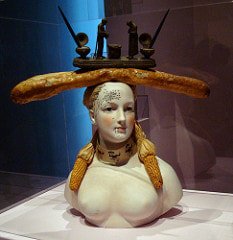
We enjoyed walking 10 miles mostly around Central Park on Friday. In the park we visited the zoo, we all enjoyed the penguins and the peacock, that would walk in the walkways since it is an open aviary. When we were worn out, we tried out the subway and surprisingly we were able to understand the announcements being said by the conductor, but unfortunately we had trouble using our metro passes at the turnstiles. To end the night, we liked visiting MOMA and seeing the Retrospective Bust of a Woman by Salvador Dali.
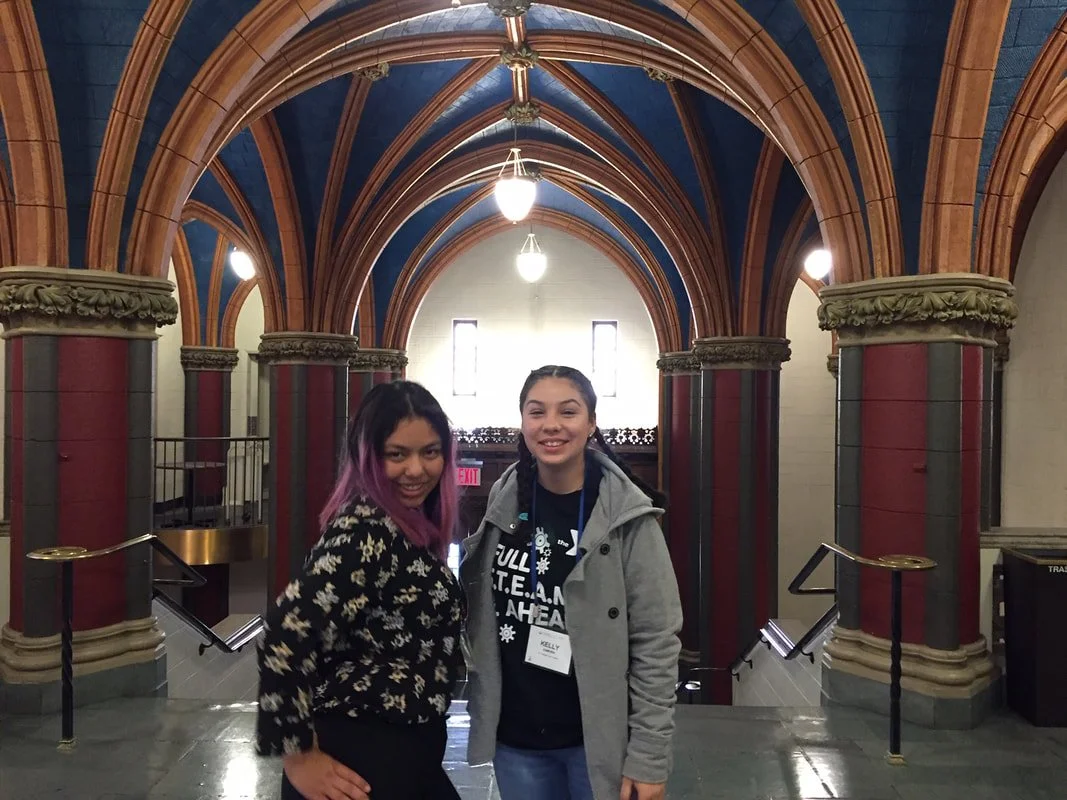
Saturday was the day of the FabLearn International Maker Conference. On Saturday waking up at seven was a struggle since it was 4am back home. We took a while getting up but we made it to Columbia on time. The first couple keynote speakers and panel were really interesting. One of our favorite presenters was Edna Tan. She helps refugee children make toys and decorations to make their community center feel more like home. We also really enjoyed Joanna Weidler-Lewis and Cynthia Graville's poster on working with incarcerated women and their families. They help create maker activities for women to do during visitation with their children.
How to Guide for…Encyclopedia Table
1/3/2019
Check out our newest instructable: https://www.instructables.com/id/Encyclopedia-Table/
Encyclopedia TableBy sgfycmaker in WorkshopFurniture
Supplies
Table parts
23 encyclopedias
metal rod and bolt
encyclopedia pages
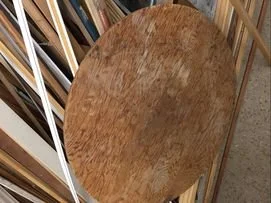
old table base
round wooden tabletop
Tools
electric drill and wood drill bit
hot glue gun and glue sticks
ratchet wrench
screwdriver and screws
Craft supplies
mod podge
epoxy resin
glue sticks
wood glue
rulers
markers
scissors
construction paper
Step 1: Finding Your Table Parts
We found a piece of scrap wood at our local hardware Habitat for Humanity Re-Store store. We also got a base for the bottom from an old restaurant table. Someone donated the encyclopedias.
Step 2: Getting the Base Ready
We used 23 encyclopedia books, you can use any books you'd like!
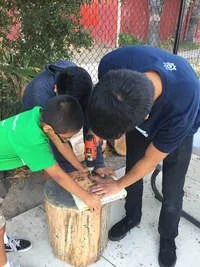
Measure and mark the center of each book, mark it with a red sharpie so it is easy to see. Once all the books are marked you can start drilling a hole through each one. We drilled the books using a wood drill bit and on a hard surface. Remember that the hole has to be big enough so the support rod can fit through it, so that is the size of the drill bit.
Step 3: Building the Base
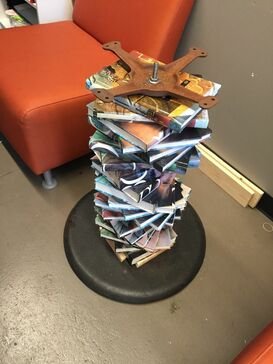
Put each book on the the rod on the base.
We used hot glue in the center and wood glue on the edges to make it stick right away and stay together for a long time. Turn each book at the angle you want for the book stack which is building the base.
Put the metal support part on top of rod and use a ratchet wrench to make the bolt tight. We had to keep adding books until we reached the top of the rod.
Step 4: Cover and Design (design Is Optional)
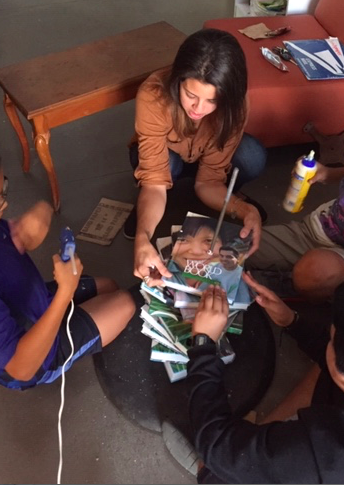
We ripped pages out of encyclopedia books and used mod podge to hold and seal the papers.
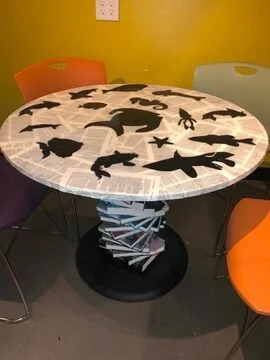
We cut out fish shapes out of construction paper to design the table (you can cut out any designs you like).
Step 5: Final Touches
Measure and mark with marker where the screws go to attach the top, and drill holes in these spots. Attach the round top of the table to the support rod connected to the base. We used screws in the metal support that went into the top of the table.
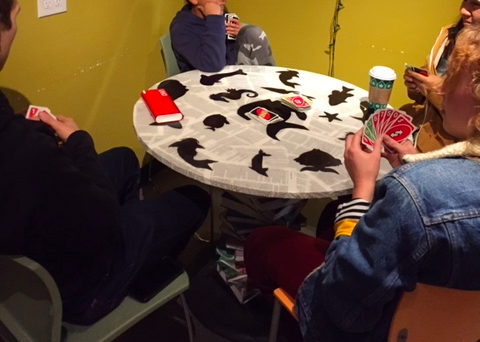
We used epoxy resin for the top coat. Please follow the instructions on the box and wait a day. Now the top is hard and can be used to play cards or do homework!
Encyclopedia Table
9/27/2018
More Launching
It was September by the time we could launch water balloons again and we confirmed the leak was successfully patched. Now the launcher could hold air pressure and we didn't have to keep pumping it. It was easier to see the balloon in real life than in the video. But you can the see the balloon at 00:59 in the video.
When it finally was time to present we weren't as nervous as before, talking to the other panelists was fun and since there were less people there we felt more calm. We were more nervous about talking too fast and not speaking clearly. But it went well and at the end of our presentation multiple people gave us the idea of bringing the talent show robots to kids in hospitals who aren't able to sing or dance. We both felt relived at the end of our performance and were happy that we did a good job. (Some of our slides and the video we showed are below).
Once is never enough for New York, we hope to come back again soon!

We're in our "repurposing" unit and learning how to make a table out of encyclopedias. Many of us haven't heard of encyclopedias, only wikipedia and this is a way to make these books useful again! The goal is to use the encyclopedias as a column to support the round table top.
We started by measuring the center of the book and marking it on both sides
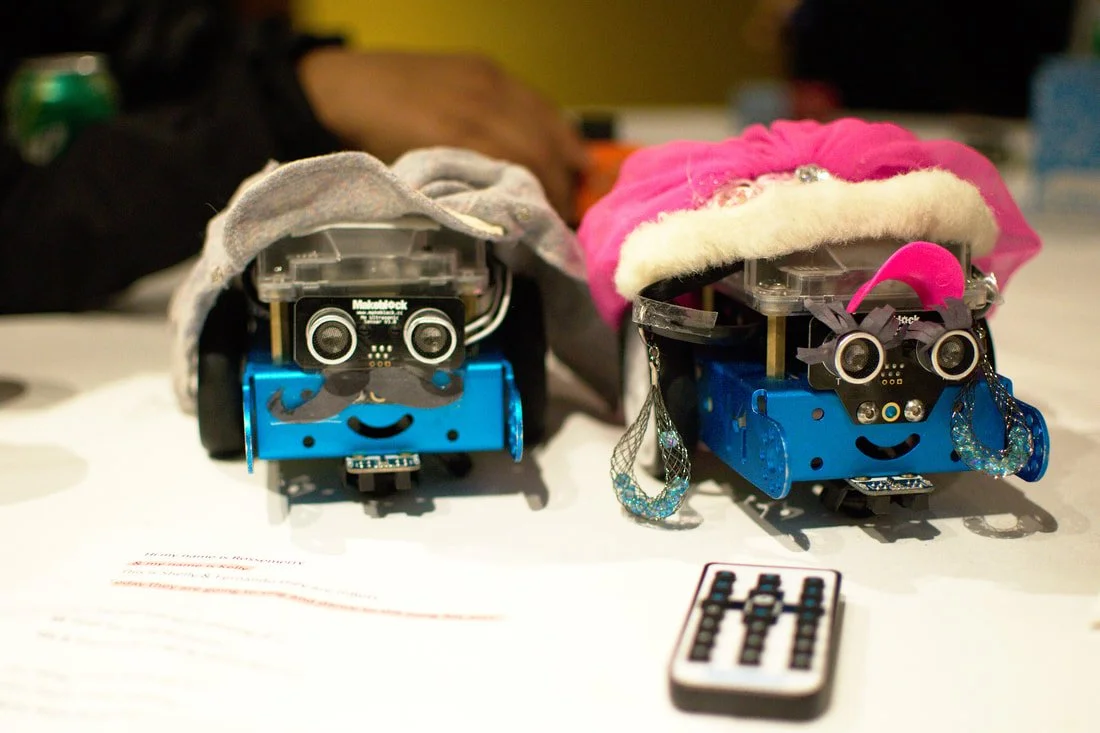
At the showcase, R. and Kay both pressed the remote to make Fernando sing while Shelly danced. Then they put on the music and they started to dance together. Dee's favorite part was when they both danced together, and then left off the stage. R.'s favorite dance move was when Shelly went backward quickly and would spin. Especially fun was when they spun together at the same time or when Shelly kept spinning. We also liked how Fernando sang by playing each note. Shelly also played the notes to the part, "My Girl! MY GIRL!" at the very end. Take it away mbots!
--Change makers group
Next we did some practice drilling outside. Then we drilled a small hole in each book.
We drilled a larger hole in each book with huge wood drill bits and the vaccuum to clean
up sawdust.
Last week we sanded the covers and stacked the books on the metal rod to support the
table 'leg'. We used wood glue and hot glue. We're not done yet, but we're close!
We still need to paint and attach the table top. More photos to come!

The Good, the Bad, and the #Best of Isla Vista
9/20/2018
Our piece, The Good, the Bad, and the #Best of Isla Vista, was just published in a peer-reviewed youth journal!! In this article, we present our teen leadership group and projects. We describe our "I'm a Student Too!" campaign, and why it is important to raise awareness about Latino/a children and families that live in Isla Vista, California, which has the reputation of being a college town. We outline our group's mandate to create a better, safer, and healthier place where youth and families can grow up. We then describe how we collected data on people's opinions of Isla Vista over the past two years and how we shared this information in town halls, University of California Santa Barbara orientations, and community conferences to make positive changes in our community.
Authors reflecting on the writing process and article:
"'I'm a Student Too campaign' is important because it brought awareness to the IV community about safety and drug issues"
--Odalis
"I mostly helped with the editing. It was a long, lengthy process, but in the end I learned how to improve communication between community groups"
--Brise
"My piece in the article was about the Sound Project. I wrote this because I was more involved and interested in this part of the project, which drove me to analyze the stats and write this piece"
--Victor
"I contributed to the paper about what we're going to do next, the plans for the future and also what we could recommend for other leadership students or just leadership in general"
--Brandon
"Because most of us live and spend most of our time in Isla Vista, we deeply care about what happens here. Now with that said, thank you for giving us this opportunity and we're very excited for you guys to read our article"
--Natalia
Light Up the Theater!
7/19/2018
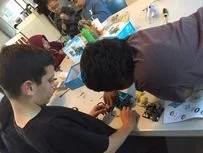
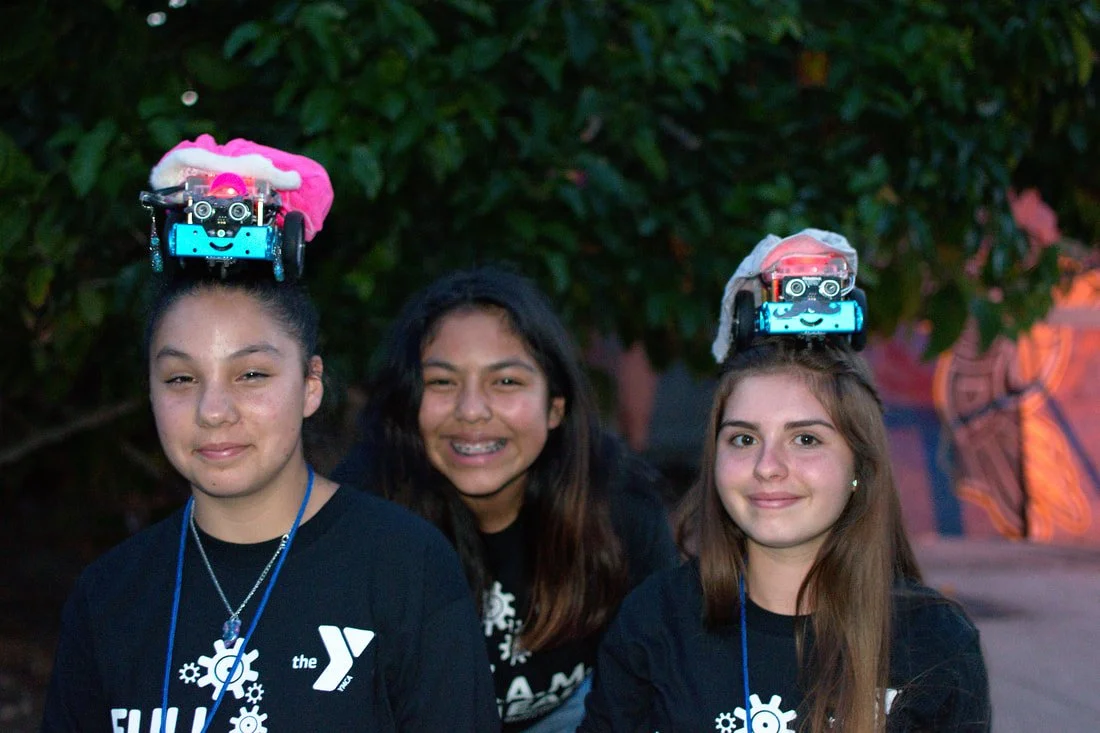
We had fun playing with mbots during our Spring Showcase! They danced and sang to My Girl.
We named them Fernando and Shelly to rhyme with our names. Designing and dressing up the mbots was Kay's favorite part. We chose to make Shelly look the prettiest with earrings, eyelashes, a hat, and pink dress. Fernando wore a mustache, and a gray coat.
Robot Seranade
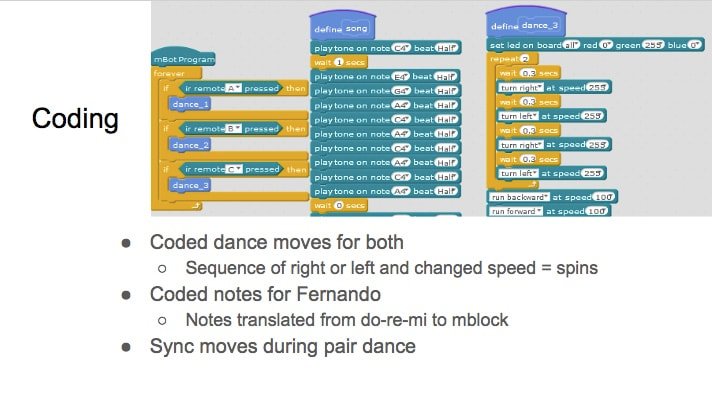
5/22/2018
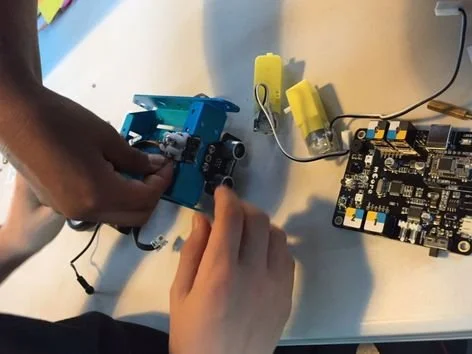
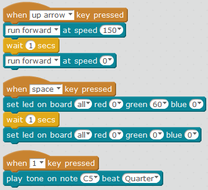
We then coded them on mblock to create dance moves and the song. We programmed the notes, whether they were half or quarter notes (the rhythm), and the tone (C, D, E, F, G, A, B). We used the song of My Girl with do, re, mi and translated it to the musical alphabet that mblock understands. After the song was done, we wanted Shelly to dance while Fernando played the notes. At first Dee was programming random dance "moves" by making the mbot go forward and spin. But then Dee wanted the mbots to do a wheely. Dee said she learned how to do that by making them go backward first and then forward really fast. There were also spins, by turning right or left. The mbot shook by going right then left then right again really fast. It looked like it was glitching when it was too fast, so we slowed down the turning. Dee spent a few hours trying to figure out how to make Fernando and Shelly sing and dance at the same time. It was nice when everything actually worked. We also learned that when the battery is running low it slowed down the bot and made Fernando sing weird like glitchy.
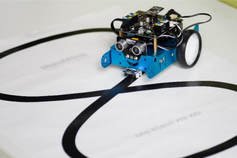
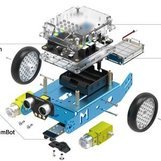
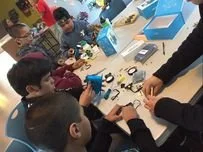
Today we took apart three mbots from last year and reassembled them to learn about their parts and how they were put together. One group didn't use the instruction manual at all!
Next we'll learn about programming them in mblock, which is similar to the Scratch coding language we've seen before.
Mbot Returns!
2/8/2018
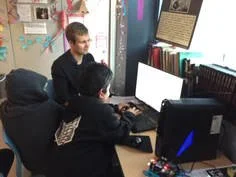
After building the mbots and playing with the remotes with infrared sensors, we're learning how to code on mblock. We can now make the robots sing, dance, and move around. A big thanks to Tyler and Engineers without Borders for their help!
We've programmed the remotes to work with the mbots in new ways, and made the mbots move forward and back, put on a show with different colored lights blinking on and off, and play Twinkle Twinkle Little Star. Next up is programming the bots to follow lines.
Mbot Magic!
3/22/2018